One of the first assignments I had my 5th and 6th grade students complete was something called Save Fred. If you haven’t heard of it, the basic premise is that Fred the Gummy Worm was out boating when his boat capsized. His life preserver has become trapped under the capsized boat, while Fred clings to its top. Students must figure out how to get the life preserver out from under the boat without knocking Fred off. The catch is that they can’t use their hands — they can only touch Fred, the boat, and the life preserver using four paperclips. Students have to work together to find a solution, trying out different strategies and evaluating what works.
Students had to document their process, recording the strategies they used as they tried to Save Fred.
Afterward, I directed students to the Next Generation Science Standard’s eight practices of science and engineering, identified in the NRC’s A Science Framework for K-12 Science Education. Students Think-Pair-Shared, and then as a class we discussed, which skills students had to use as they worked through the activity. We talked about how the “Scientific Method” is not always the linear series of steps they had been taught — sometimes (most times!) scientists used these practices out of order.
Overall, the activity was a great “ice breaker” for the beginning of the year. Students were able to do something fun, get a little treat (they ate Fred and his gummy life preserver afterward), and begin developing those scientific practices right off the bat!
Download this NGSS Science and Engineering Practices bookmark from TeachersPayTeachers. Laminate, cut, and distribute to students.
I posted a few weeks ago a template for a “Science Discovery Book” that I had planned to use with my 5th graders to bring a close to the year. I asked them to write a paragraph about their favorite science memory this past year and then draw a picture to illustrate it. I also took a photo of each student dressed in a lab coat, safety goggles, and other science accouterments. I scanned their drawings, added their photos, and compiled all of their memories into a single PDF file. I have just a few more pictures to add, and then I’ll upload the completed file — probably to Google Drive — and send out the digital file to all of the parents… That way, they can save and/or print their own copies.
If you’d like to try this with your class, you can find the template for this project at my TeachersPayTeachers store.
As we have been working our way through a unit on ecology, I have found the tropical aquarium and frog terrarium in my classroom incredibly helpful. For concepts like populations, communities, the carbon dioxide – oxygen cycle, and nitrogen cycle, students are presented with concrete examples from classroom pets they have observed all year.
To wrap up the unit, I wanted students to consider and observe the two very important cycles to the preservation of life — the carbon dioxide – oxygen cycle and the nitrogen cycle. To do this, I divided students into groups and asked them to design a closed ecosystem in which the needs of all organisms are met. You can check out the assignment pack I gave them, as well as some images of their ecosystems below:
Students test their ecosystems for water quality parameters like dissolved oxygen, pH, nitrites, nitrates, and ammonia.Some students chose to house betta fish in their ecosystems.
My students are continuing their year-long study of energy by investigating its ties to Earth Science, particularly in the form of fossil fuels. My goal in this unit is to demonstrate the effects of using fossil fuels on the environment. While certainly a big impact of fossil fuel use is climate change, my focus in this unit is the environmental impacts of extraction. (I plan to get into climate change in the next unit, as we examine climate and weather and their impacts on ecological systems.)
In my last post, my students investigated the effects of surface mining on “Earth Cookies.” I wanted to find a similarly hands-on activity to investigate oil extraction, particularly off-shore oil drilling. I came across an idea online to simulate an oil spill clean up using vegetable oil, food coloring, and student creativity. From this basic framework, I created a set of instructions and student printables for this activity. You can find it at my website:
$5.00 PDF
First, my students learned about oil by exploring the EIA Energy Kid website. We also watched a short video on the Exxon Valdez oil spill in Alaska 1989, and read about the 2010 Deepwater Horizon explosion and oil spill. Finally, students created a chart to list the different tools and strategies that are used in the real world to clean up oil spills.
The list they created included:
– booms (that contain or corral oil slicks)
– skimmers (that scoop oil from the surface)
– sinking agents (that bind to oil and make it sink to the bottom)
– sorbents (that absorb oil)
– biological agents (fertilizers that speed up plant growth and therefore biodegradation)
– dispersants (that break petroleum into small droplets)
Working from this list, students created their own devices that fulfilled these different purposes. I provided students with a number of supplies, from cotton balls and string to corks and craft sticks. They then worked in small groups to develop booms and skimmers, and to identify what materials they would use for sorbents and sinking agents.
This took about two 45 minute class periods, and they came up with some really creative ideas. You can see some of their designs below:
After this engineering activity, students created an oil spill to test their strategy. One student acted as the group’s recorder, documenting the evaluation of each device and the group’s observations.
This activity was definitely a success. I was able to incorporate engineering activities into the unit, and students were able to see the challenges of removing oil from the environment. While climate change has been a hot topic in terms of fossil fuel use, it’s important to remember these energy sources can affect our environment in other ways as well. Finally, this activity will help my students during the upcoming unit assessment, which will ask students to represent various stakeholders in a discussion over a town’s energy decisions. Stay tuned to hear more about that activity!
My 5th graders are working through a unit on natural resources, particularly our energy sources. Having learned about the layers of the earth, the rock cycle, and fossils, we are looking at fossil fuels. While they have built some background knowledge through books and online web sources (I love Energy Kids!), I wanted to incorporate hands-on activities for each type of fossil fuel.
Since the first fossil fuel we are learning about is coal, I decided to use an activity I first learned about while working at Asbury Woods Nature Center. If you do an online search, there are many free resources outlining this activity. The gist of it is that students receive a chocolate chip cookie and must “mine” the “coal chips” with a toothpick or paperclip. They get to see how the cookie, which represents the Earth, is changed by mining – a visual representation of the damage done by surface or strip mining.
To gear my kids up for this project, I started the unit by showing a video: 300 Years of Fossil Fuels in 300 Seconds, available at YouTube. This video is VERY information heavy, so I made sure to explain to students I don’t expect them to learn or remember everything. I asked them to listen for information about fossil fuels, specifically coal, and identify ONE thing they didn’t know (and now do). I will admit that I like to push my students – I don’t expect them to master every task I give them, but I always want them to TRY. And I am blessed to have students willing and motivated to do so!
After we watched the video, I discussed with them how the Industrial Revolution changed our source of energy from “muscle power” to “machine power,” which derives its energy primarily from fossil fuels. We discussed how nearly everything we use and do each day is in some way created from fossil fuel power, and we brainstormed what might happen if suddenly we didn’t have that source of energy anymore.
After this class discussion, students read about fossil fuels from a volume in a set of books called Science Explorer. TheScience Explorer series are a set of thin books on a wide range of topics, and I actually prefer them to our science textbooks. As they read, students worked together to make an outline of all of the headings and the important information found in each section. This was a skill that was new to my students, so we did the first few headings together, and afterward, we reviewed what things students wrote under each heading. You can see a sample of their outlines below:
Then, students read about the mining and transportation of coal in more detail from the Energy Kids website.
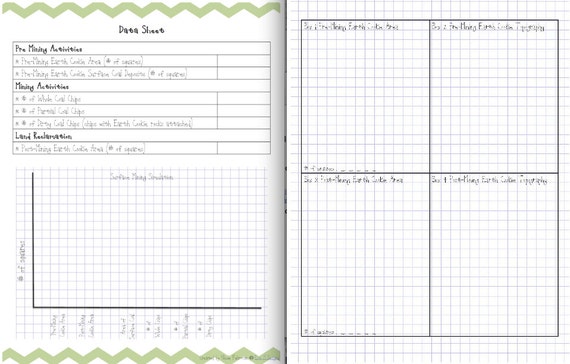
Then, our activity started! Briefly, students were given a set of instructions (class set), the supplies to mine their cookies, the graph paper worksheet, data analysis worksheet, and conclusions worksheet. As a part of their data analysis, I provided the skeleton of the chart I asked them to create, as this is a skill that is relatively new to my middle school students. It was a great way to incorporate math into the activity without taking up a ton of time!
Like I said above, you can find many free resources that explain this activity. They can provide you with the instructions and maybe some follow up questions. That said, the instruction sheets and student worksheets that I created are available for purchase at my Etsy shop, as well as TeachersPayTeachers. I love resources that look professional AND fun, even if my students and I are the only ones to see them! If you are the same way, please check out my creations! You can also see a preview of these documents below. I was able to utilize Roxie’s Creations, Trina Clark, and DigiWebStudio to make it all look absolutely wonderful as well!
cover page of activity packstudent worksheets
My students LOVED the activity – let’s be honest, anything that involves food is a hit!
They also learned a lot though. Not only were they able to see the effects of mining on the environment as a problem, but they could also identify its consequences and brainstorm ways to reduce that impact.
Not too bad for a 5th grader!What are three ways we can minimize the impact of coal mining and use on the environment?
This year, Star Lab visited our school. Unfortunately, it came during the holiday season, and with everything else going on (and already being in the middle of another unit), I didn’t have the time to devote four or five classes to an introduction to astronomy. Even so, I still wanted to utilize the resource and give my fifth graders the opportunity to see the “night sky” in school. I ended up creating the activity below as a fun way to end the week, while still giving the students a little dose of starry skies.
I started the lesson by asking my students to imagine they lived a long time ago. Every night the sun disappeared, and millions of tiny sparkly dots filled the sky. Not really understanding what these tiny dots were, they created myths to explain their presence. That was what we were going to be doing today.
Students then picked a constellation at random from the pile. I had printed the constellation picture, star information, and legend from the Star Lab website. They provide curriculum for the different “layers” you can use (which is not limited to astronomy — they have shells for plate tectonics, the cell, and weather too!). I cut the constellations into strips and folded them so that only the picture was visible. I then stapled the folded paper shut, so no one would cheat during the activity. After our activity, I encouraged them to pull out the staple and read the real myth associated with their constellation.
We then entered the Lab, and I asked students to take a few minutes to silently look at the stars, find their constellation, and construct a myth based on their impressions. After a few minutes (they actually did a great job during this reflection time!), one by one, students shared the myths they had created.
Looking back, I wish I had recorded them. While many students simply told stories about the star (it looks like a waiter at a coffee shop, it looks like a dog…), a few of my students really got the idea of this myth-making. According to one boy, one constellation depicted an ax that had been taken away from the people by God after they had destroyed the environment by overharvesting their resources…. Another depicted a one-armed man (Lucky Lefty) who had lost his arm and life in a fight with Right Hand Rick, but instead of death, God placed him in the stars in honor of his bravery, or something along those lines… They not only had neat story lines, but they had a real knack for storytelling. I was impressed!
After we left the Lab, I listened to them telling each other the Greek myth associated with their constellation, as they finally unstapled their papers and found the information inside. Even though it wasn’t particularly “sciencey,” the kids had a good time, and it had definitely piqued their interest in stars and myths.
The first unit my students in both 5th and 6th grades are learning is the scientific method — specifically, how do we use scientific inquiry to solve problems? To start the year off, I wanted to expose my students to some “scientific inquiry skills” that they are probably already pretty familiar with — and to identify those as tools scientists use. Instead of reading about these skills in books, though, I created a series of mostly hands-on stations that asked students to use those very skills!