Since school is starting in literally two days, I figured I should finish posting about my classroom setup. I still have a few things to do, but here are some of the projects I completed this summer (in no particular order):
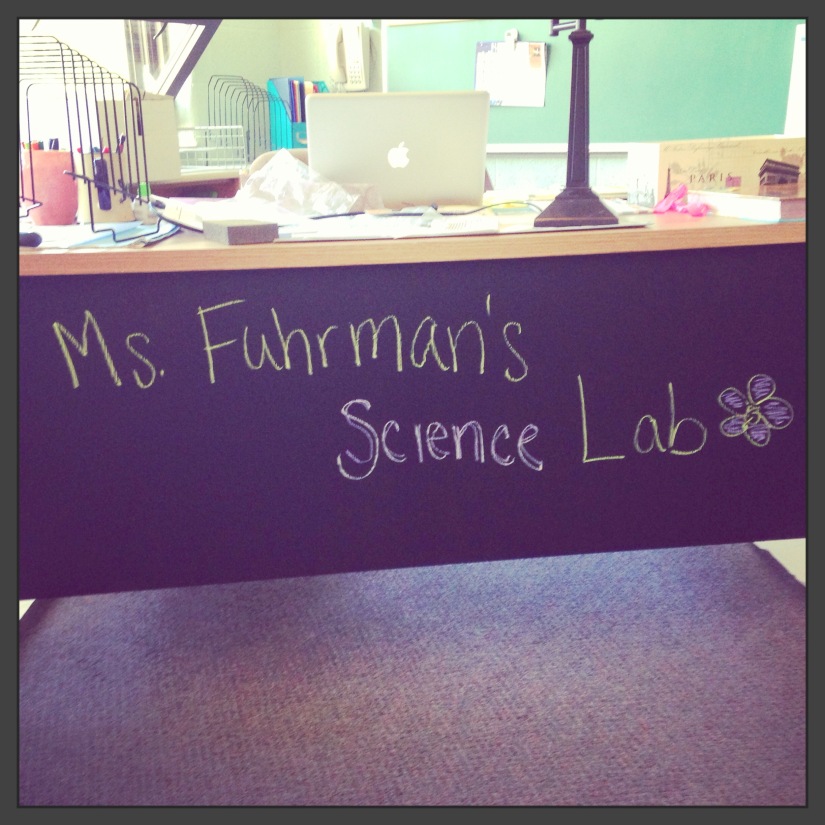
1. Chalkboard Painted Desk: With the permission of my principal, I painted the front and two sides of my desk with chalkboard paint. Now, both the students and I can use the space for art and drawing, posting notes, etc.
First, I sanded down the painted metal desk, just enough to rough it up a bit. Then, I applied two coats of chalkboard paint – I used the kind from the can, NOT the spray kind.
2. Extra Storage: Who doesn’t need a little extra space? I found this little island in my neighbor’s yard, heading to the dump. It was an ugly beige color, so I painted it blue to brighten it up. I then painted little brown dots along the drawers to add a little character.

3. Memory Wall: When I taught in North Carolina last year, I had access to a great book called Teaching for Excellence with the PEAK Team. I recommend it for all teachers working with kids in grades 4 and up. There are some AWESOME instructional ideas, as well as information on classroom management, organization/setup, parent contact, etc. One of the ideas I found in the book was the Memory Wall. Basically, throughout the year, you take pictures of student activities, projects, special days, etc. Students can also bring in their own photos as well. At the end of the year, you can take all the pictures and create a scrapbook or album. It’s a neat relationship-building/community-building center in the room.
I took pages of scrapbook and attached them to the chalkboard to create the quilted look. Then, I added border to separate it from the rest of the board.

4. Comfy Cozy Reading Center: I created a corner of the room for students to get comfortable and read. The fifth and sixth grade teachers at my school have built a Silent Sustained Reading time into the schedule at the end of the day, and I am implementing a Drop Everything And Read time in the morning for my homeroom as well, so I think students will definitely enjoy this corner. If behavior becomes an issue, I may use the pillows and beanbags as an incentive for good behavior — for example, they may be able to “buy” corner time with their ClassDojo points. I am going to try keeping it open for now though.
I also added mini lights and cute lamps to the area to soften it up. Right now, my room gets a TON of sunlight, but I figure those soft lights may be nice in the winter when everything is cold and gray!

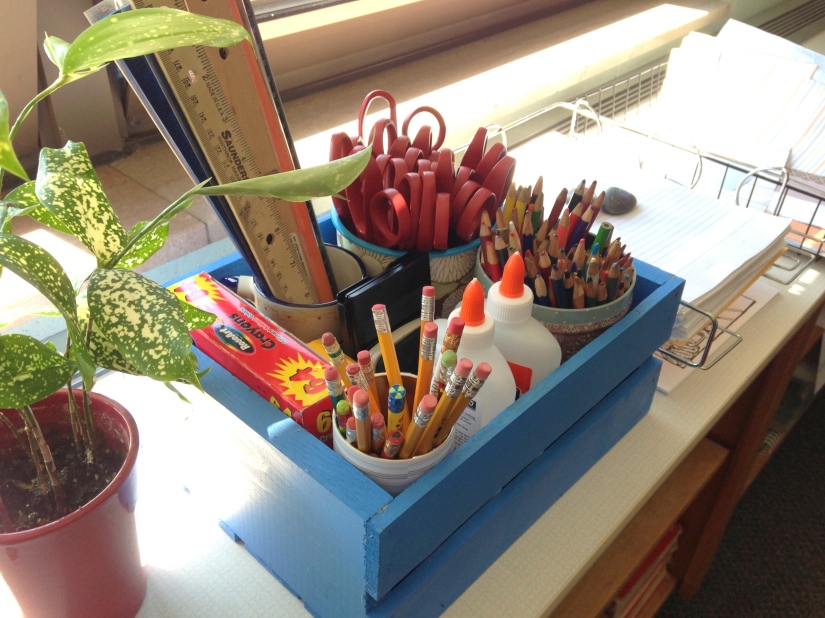
5. Supply Station: I painted a crate I purchased at the craft store blue and set it up as a Student Supply Station. Students are welcome to use any of the supplies in the box, provided they return them. I will have one student responsible for monitoring the box in each class, making sure all supplies are returned before dismissal. I will also have a student sharpen the pencils in the box each day (the regular ones, not necessarily the colored ones), so that students who need a pencil do not need to interrupt class with the loud sharpener.
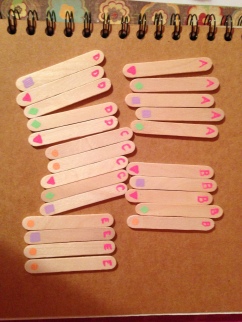
6. Group Choosy Thingamabobs: I “stole” this idea from a professor I took Content Literacy with, but I spruced it up Pinterest-style with some cute paints. Basically, each corner of the popsicle stick has either a letter, number, symbol or color. The four options divide the students into different number groups — there are four shapes/symbols, eight numbers, five letters, and six colors. Students will draw a popsicle stick, but they may not know in which way you plan to divide them. This prevents the, “Oh, let me switch with you so I can be in So-and-So’s group,” swapping that happens in all middle and high school classrooms (maybe even elementary — not really my area of expertise!). It also makes sure to randomize grouping, as counting off in assigned seats will not give you much variety after a while.

7. Student Choosy Thingamabobs: I don’t remember where I heard of this idea, but I think it’s a great one too. Instead of doing the, “Can anyone tell me…?” and hearing from the same four kids every time, choosing popsicle sticks with student names randomizes the selection and also sends the message that all students need to be prepared to participate at all times.
Of course, I like to give students the opportunity to be successful before putting them on the spot, so I like to use Think-Pair-Share or similar discuss-with-your-neighbor type activities before I actually call on anyone. Another strategy I really liked that I learned in North Carolina was, “What did you hear in your discussions?” It gives kids an “out” — instead of asking them to share only their own thoughts (which can be really intimidating for some kids), students can share ideas under the guise of “perhaps someone else said it.” Of course, sometimes they may share things someone else actually said as well – and that is great too! At least you know they were listening to each other!

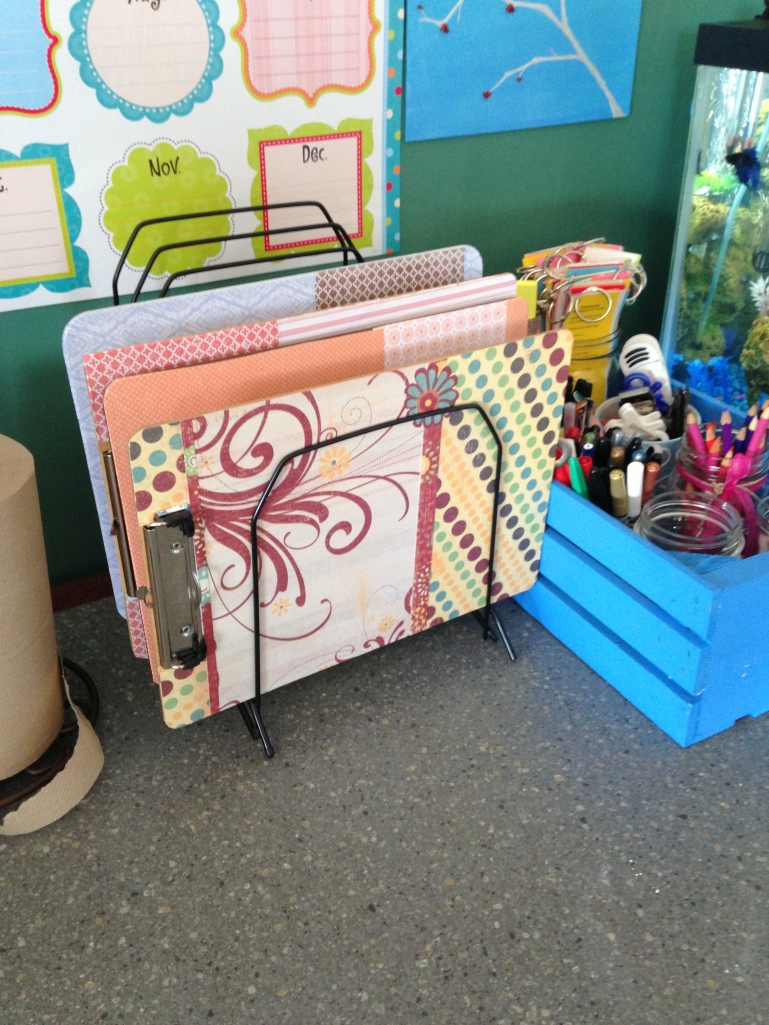
8. Clipboards: All teachers have clipboards around – you never know when a student might need to take something in the hallway, outside, or just at centers around the room. I spruced mine up with some scrapbook paper and mod podge! I have about eight in all now, although only a few are shown here. I found simple brown ones at Walmart for $0.50, so it wasn’t a lot of money out of my pocket and the result is super cute!
9. Dry Erase Boards: Kids love dry erase boards, and it’s a good way to check for understanding in the class at large. Pose a question, students write their answer and hold it up on your command. Bingo, you can see who got it right, who got it wrong, the overall understanding of the class, etc. without actually putting anyone on the spot. Instead of costing me a fortune buying $10+ boards from Target or Office Max, I went to Lowes and bought a $13 sheet of “white panel board” in the molding section. Then, I had them cut it into 12″ x 18″ rectangles and voila! Dry erase boards.
Since taking this picture, I have covered the edges with cute washi tape to create a bordered, finished look.

10. Tabletop Bookshelf: I used the top half of a cheap fiberboard bookshelf I picked up at a garage sale to create a tabletop science center display case. I want my students to become familiar with scientific tools, so I am displaying them 24/7 to peak student curiosity! I have labeled the various instruments, so that students can connect the proper name with the actual tool.


 I’m not sure which one this is…


